
Last updated October 8, 2026
Whole-system duct and dryer vent check with before-and-after photos - you see exactly what came out of your vents
That "$99 whole-house special" is a bait ad - the real number appears once they are in your hallway, or the "clean" is a shop-vac at the register. We photograph the inside of your ducts before and after instead.
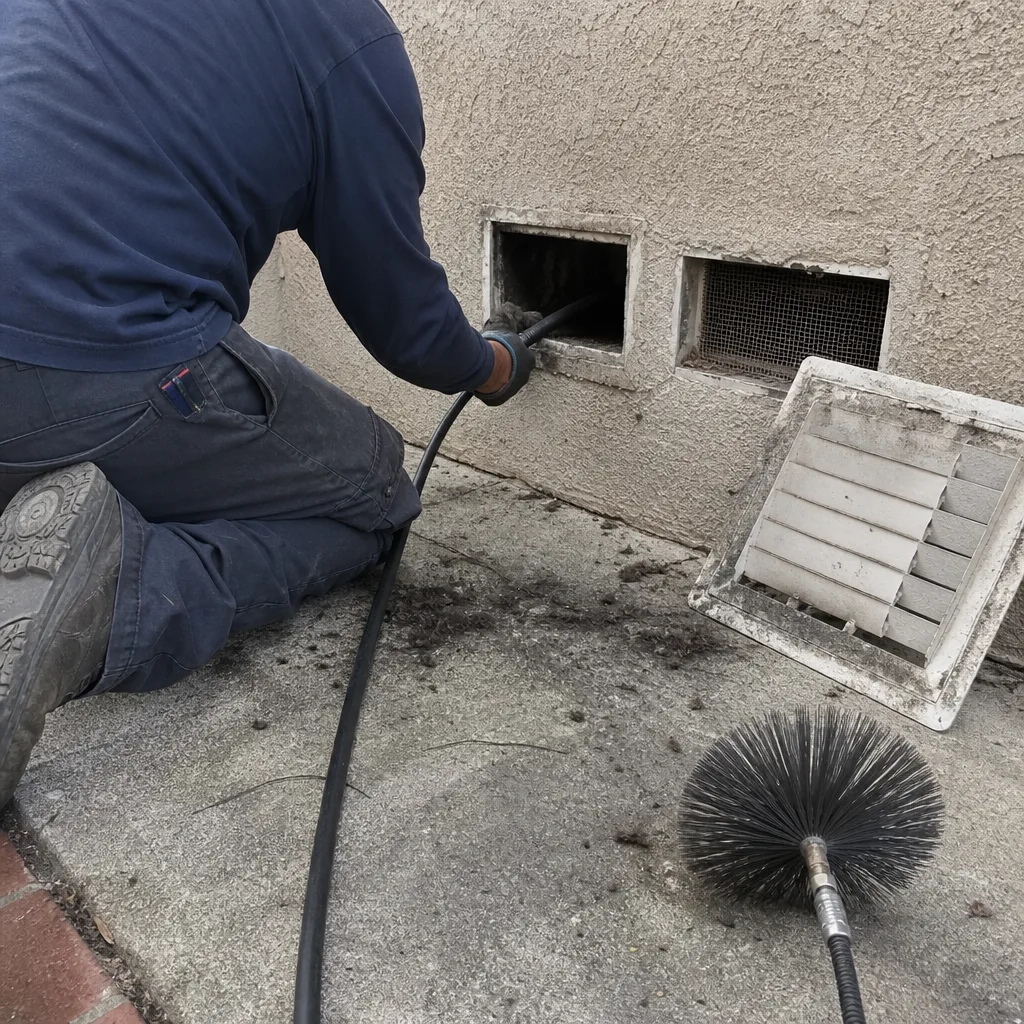 Before
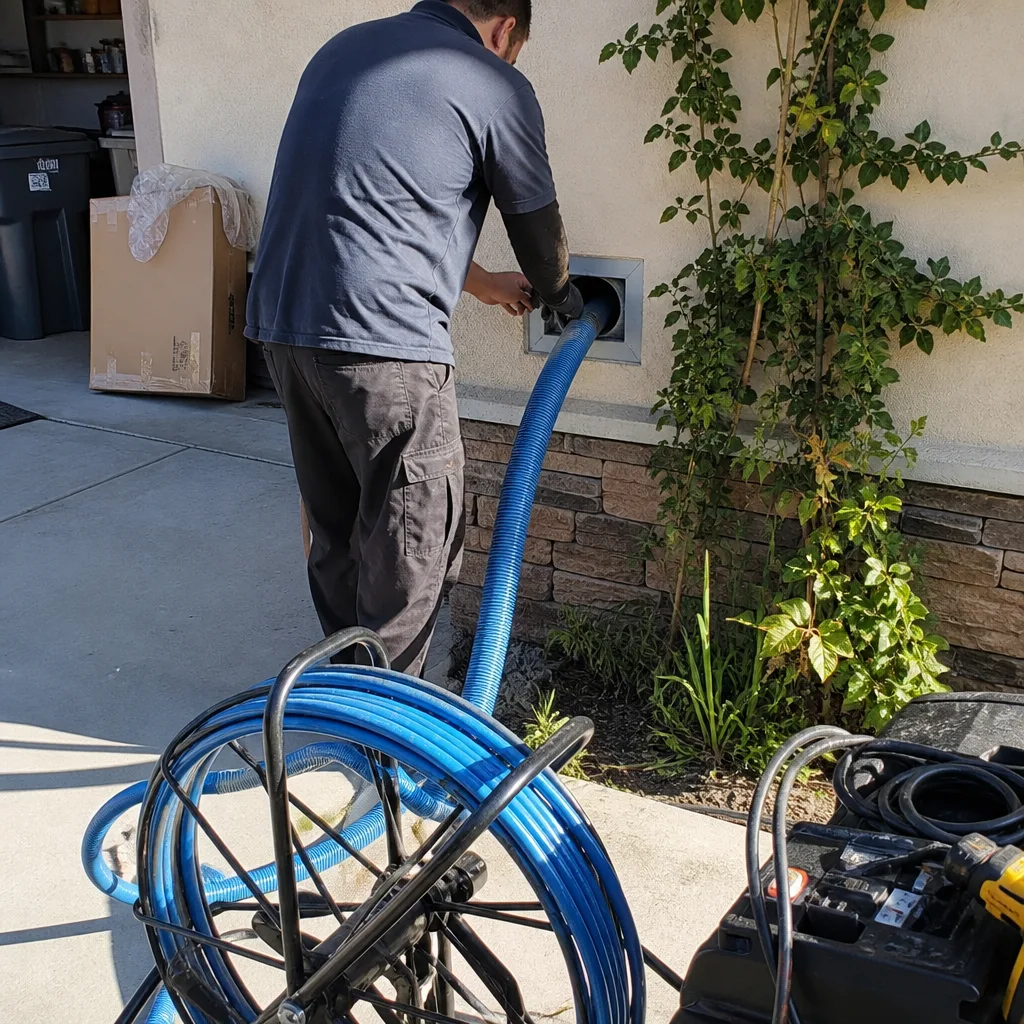 After
After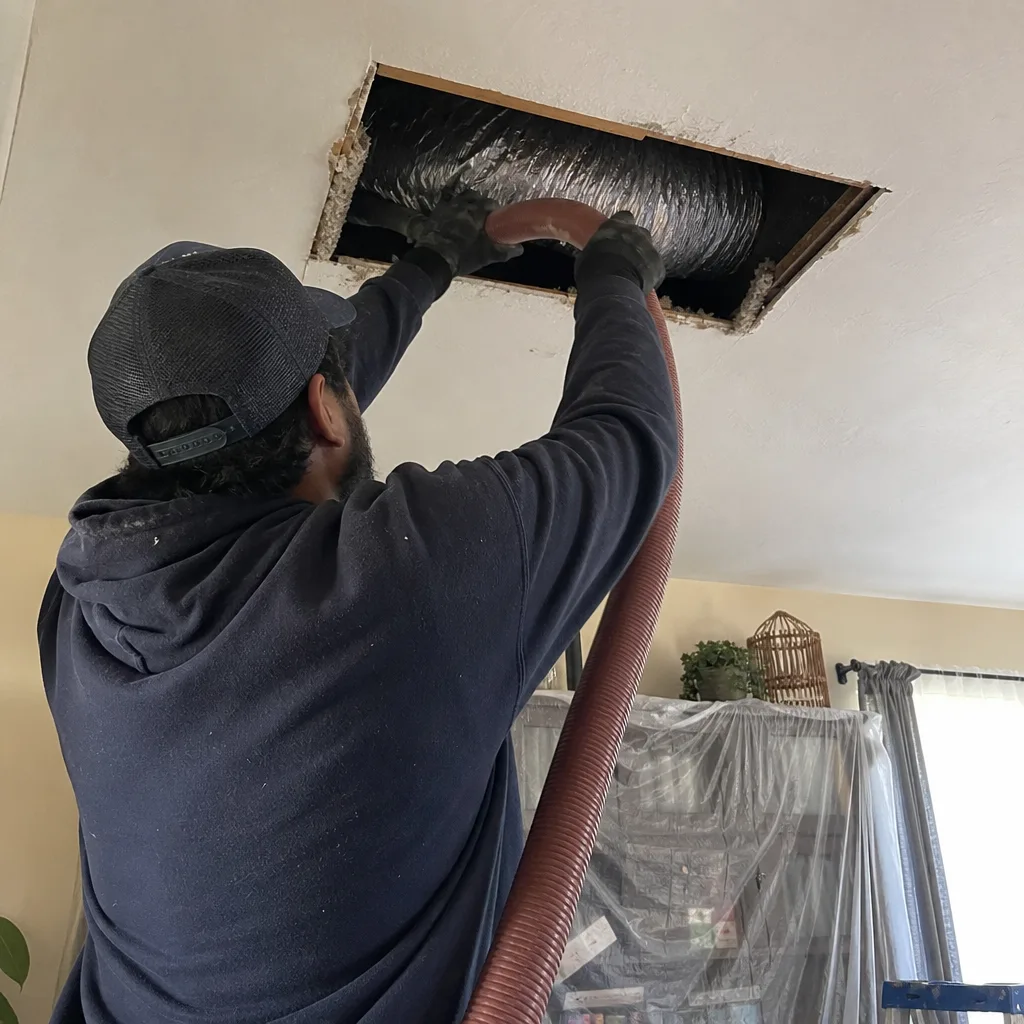 Before
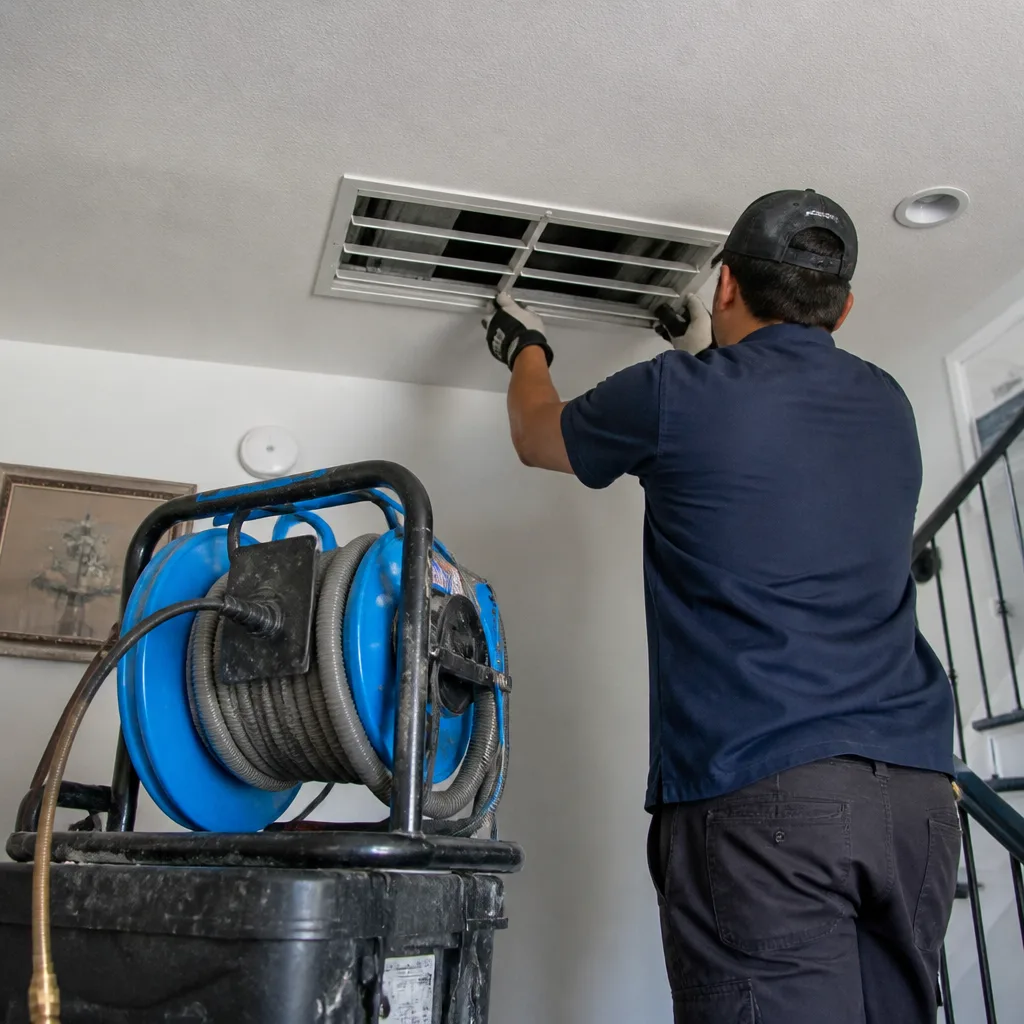 After
After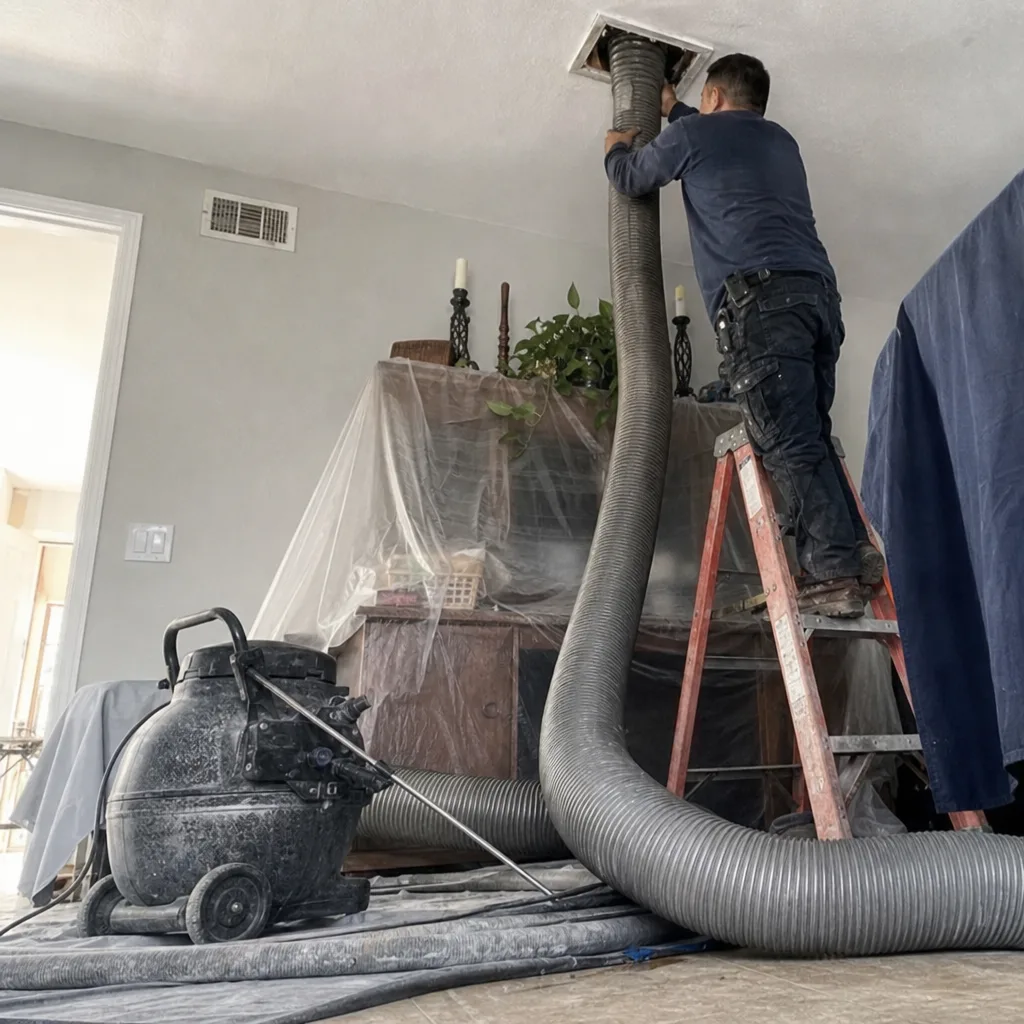 Before
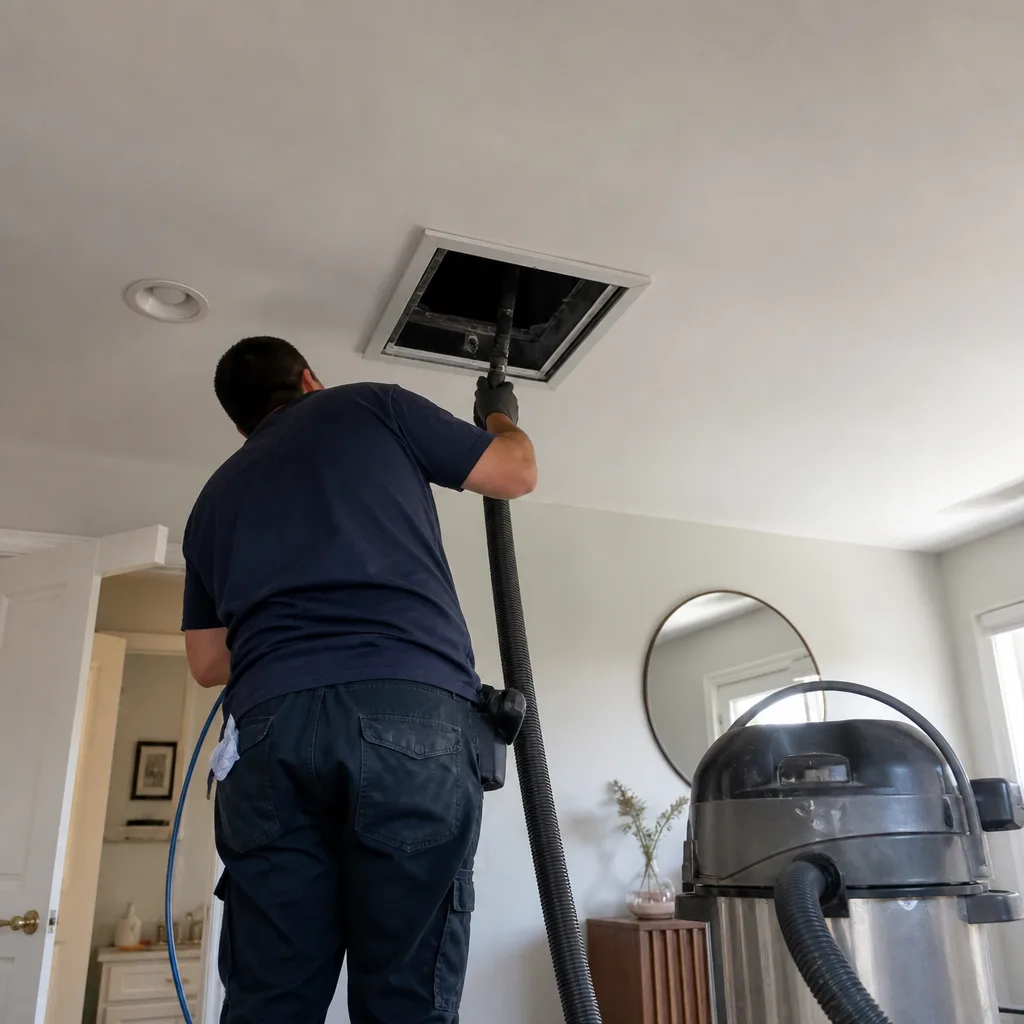 After
AfterDIY vs Professional Air Duct Cleaning: What’s Safe to Do Yourself
Renting a “duct cleaning kit” from a hardware store and running it through your registers without negative air pressure working at the same time is like sweeping dust off a shelf with a fan pointed at it. You move it, you don’t remove it. That’s the uncomfortable truth most DIY guides skip, and it’s why we hear from Los Angeles homeowners every month who tried the rental route and ended up with dust settling back onto every surface in the room. This guide-along with our deeper DIY vs Professional Air Duct Cleaning: The Los Angeles Homeowner’s Decision Guide-explains where the DIY line actually falls, what two tasks are genuinely worth doing yourself, and how to spot a professional who’s using real equipment versus one who’s running a glorified vacuum hose through your vents.
Quick Answer
The only two things a homeowner can safely and usefully do to their own air ducts are replacing the HVAC filter correctly and cleaning the register covers. Everything else, including running any brush or vacuum attachment into the ductwork itself, requires professional-grade negative air pressure equipment to actually extract debris rather than redistribute it, and attempting it without that equipment can damage flexible duct liner or dislodge settled contaminants.
Table of Contents
- The Physics of Why Duct Cleaning Requires Negative Air Pressure
- The Two Legitimate DIY Tasks (And How to Do Them Right)
- When DIY Goes Wrong: Specific Scenarios That Cause Measurable Harm
- Why Professional Equipment Isn’t a Homeowner Tool: The Economics
- What a Professional Duct Cleaning Actually Involves
- How to Evaluate Whether a Company Uses Proper Equipment
- What Los Angeles Homeowners Should Know Specifically
- Common Mistakes to Avoid
The Physics of Why Duct Cleaning Requires Negative Air Pressure
Here’s the core problem with every DIY duct cleaning attempt: without a vacuum pulling air from the main trunk line while you agitate debris from the registers, you’re not extracting anything. You’re kicking it up. The dust, pet hair, and dander that’s settled inside your return ducts gets loosened by your brush or air hose, becomes airborne, and then resettles either deeper in the ductwork or back into your living space once the furnace kicks on. This is not a subtle distinction. It’s the entire difference between cleaning and rearranging.
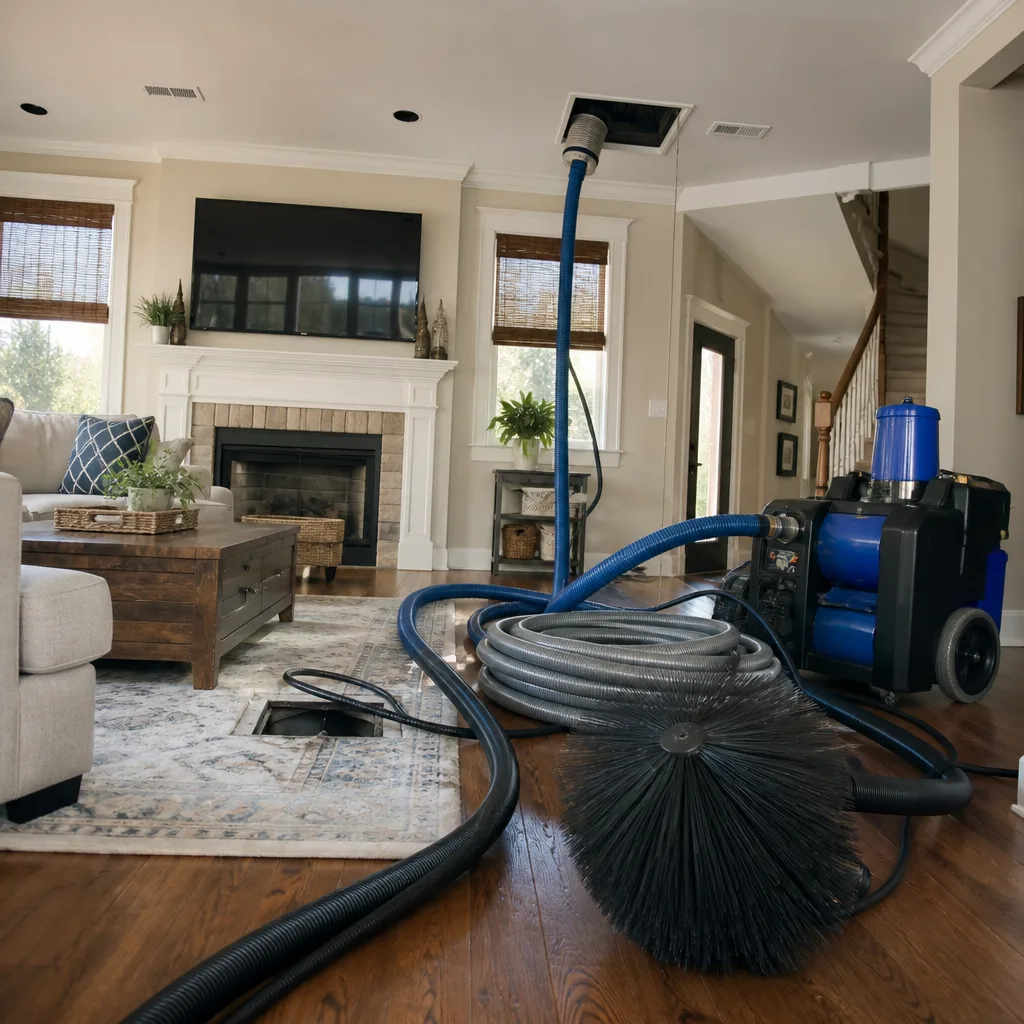
Professional air duct cleaning works on a simple principle called source removal. A HEPA-filtered vacuum creates continuous negative pressure inside the main trunk line, typically pulling 2,000 to 3,000 cubic feet per minute of air. While that vacuum is running, agitation tools, usually rotating brushes or compressed air whips, loosen debris from the duct walls. The debris has nowhere to go except into the vacuum. Without the vacuum running simultaneously, the same agitation simply suspends particles in the air and lets them drift. Think of it like sanding a floor with no dust collection system attached. You’re making the problem airborne instead of contained.
Los Angeles homes compound this issue. Our dry climate means dust is finer and lighter than in humid regions. It hangs in the air longer. Add in the fact that many older LA homes, especially in neighborhoods like Van Nuys, North Hollywood, and the Westside, still have original ductwork from the 1960s and 1970s, and you’re dealing with decades of accumulated debris that’s exceptionally easy to dislodge and exceptionally difficult to collect without proper equipment.
The Two Legitimate DIY Tasks (And How to Do Them Right)
We’re not here to tell you there’s nothing you can do yourself. There are exactly two tasks that are safe, useful, and genuinely worth your Saturday morning. Everything else falls on the professional side of the line.
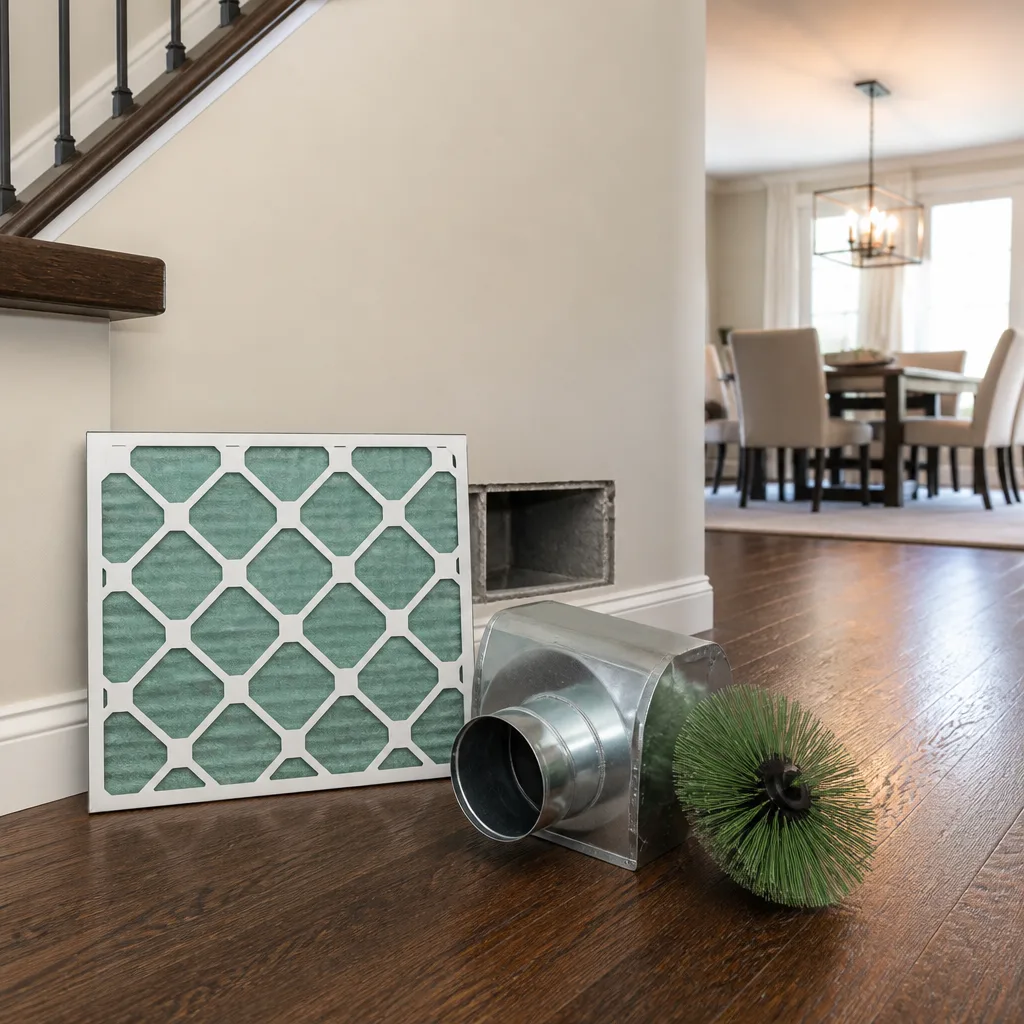
Task 1: Replacing the HVAC filter correctly. This is the single highest-leverage thing you can do for your system, and it takes two minutes. The key detail most people miss is the airflow direction arrow printed on the filter frame. That arrow must point toward the blower motor, not away from it. Installing a filter backward reduces its effectiveness significantly and puts strain on the system. Most filters need replacing every 60 to 90 days in Los Angeles, where continuous AC use from May through October means more air moving through the filter. Homes with pets, especially dogs that shed heavily, should check monthly and plan for more frequent replacement. We recommend Aprilaire and Honeywell filters as reliable options that maintain a good balance between filtration and airflow. A filter that’s too restrictive can starve the system and reduce efficiency.
Here’s the step-by-step:
- Turn off the HVAC system at the thermostat. Never replace a filter while the system is running.
- Locate the filter slot. It’s typically in the return grille in a hallway ceiling, or inside the air handler unit itself, often in a closet, attic, or garage.
- Remove the old filter and note the direction of the arrow printed on its frame.
- Insert the new filter with the arrow pointing toward the blower motor (the direction air flows).
- Mark the replacement date on the filter frame with a permanent marker. Future you will thank you.
- Turn the system back on.
Task 2: Cleaning register covers in the sink. The metal or plastic grilles that cover your supply and return openings collect a surprising amount of dust, pet hair, and cooking residue. Pop them off with a screwdriver or by hand if they’re the hinged type, and wash them thoroughly in warm water with mild dish soap. Use an old toothbrush to scrub between the slats. Let them dry fully before reinstalling. This is genuinely useful, it keeps visible dust from being pulled into the registers, and it’s completely safe. Clean the surrounding ceiling or wall area with a damp cloth while the covers are off, being careful not to push debris down into the exposed duct opening. A light swipe with a damp cloth around the opening lip is all that’s needed. Do not reach into the duct itself with anything.
Those two tasks, done consistently, will keep the system running cleaner between professional cleanings and will genuinely help your indoor air. But that’s where the safe DIY list ends.
When DIY Goes Wrong: Specific Scenarios That Cause Measurable Harm
The rental kit conversation usually goes like this: the homeowner sees a duct cleaning attachment at a local rental counter, it’s forty dollars for the afternoon, and the duct cleaning quote feels significant by comparison. The math seems obvious. But the scenarios below are not hypothetical. We’ve walked into Los Angeles homes after DIY attempts and seen each one firsthand.
Dislodging settled mold spores. If your ductwork has any moisture history, which is common in coastal LA neighborhoods like Playa del Rey or Marina del Rey where marine layer humidity seeps into homes, there may be dormant mold spores sitting in the duct liner. Agitating them without extraction sends them into your living space. Once airborne, they can trigger respiratory issues in kids, elderly family members, or anyone with allergies. The agitation itself turns a contained problem into an exposure problem.
Damaging flexible duct liner. Many LA homes, particularly those built or retrofitted since the 1980s, use flexible ductwork for at least part of the run. The interior insulation liner is delicate. A rental brush attachment or a homeowner-run drain snake with a brush head can tear that liner, which then creates a warm, dark, fiberglass-spewing environment. Once that liner is torn, the fix is duct replacement, not cleaning. That’s a far larger invoice than a professional cleaning ever would have been.
Voiding HVAC manufacturer warranties. Most HVAC equipment manufacturers, including the major brands installed throughout Los Angeles, specify in their warranty documentation that duct cleaning must be performed by qualified professionals using source-removal methods. If you puncture a coil, disconnect ductwork, or damage a heat exchanger while attempting DIY cleaning, and the manufacturer determines the damage came from unprofessional cleaning, your warranty claim will be denied. A new coil or heat exchanger can run into thousands of dollars. The forty-dollar rental just got very expensive.
Compressing debris deeper into branches. This is the most common outcome we see from rental equipment. Without the vacuum pulling from the main trunk, your brush pushes a layer of compacted dust and hair further down the branch lines, compressing it into the crevices and joints. That debris is now harder to remove than it was before you started, because it’s been packed in rather than simply settled. A professional cleaning after a DIY attempt often takes longer and sometimes costs more, because the debris has been compacted.
Why Professional Equipment Isn’t a Homeowner Tool: The Economics
Let’s be blunt about the numbers, because understanding them explains why the pros-vs-DIY gap exists at all. A Rotobrush brush-and-vacuum system, which is what we run at Morton’s Air Duct Cleaning, costs between $8,000 and $15,000 depending on configuration. That’s the entry point for the portable units. A full truck-mounted system with a Nikro HEPA vacuum can run $25,000 to $40,000. These are not tools that make sense for a homeowner who will use them once every three to five years, and that’s exactly why the rental market exists as a cut-down, low-powered approximation that doesn’t do the job.
The rental unit you get from a hardware store or equipment rental counter is fundamentally different from professional equipment in three ways. First, power: rental units typically have far less suction, often under 800 cubic feet per minute, which is insufficient to pull debris from the far reaches of a residential duct run. Second, filtration: professional equipment uses HEPA filtration, which captures 99.97% of particles at 0.3 microns. Most rental machines use basic shop-vac filters that let the finest particles pass right through and recirculate into your home. Third, agitation method: a proper source-removal clean uses powered brushes or air whips driven by a compressor, not a homeowner waving a brush attachment around by hand from the register opening.
There’s also the question of what you’re actually able to reach. A homeowner with a rental kit can access maybe the first 18 to 24 inches of duct from each register opening. A professional can access the entire main trunk, every branch line, the return plenum, and the air handler. The debris you’re trying to remove doesn’t live in the first two feet. It’s concentrated in the trunk line, at the joints, and around the air handler coil. If you can’t reach it, you’re not cleaning it.
What a Professional Duct Cleaning Actually Involves
Walk through what a proper professional cleaning looks like, and the equipment question starts to answer itself. This is not secret knowledge. Any reputable company will explain their process transparently, and you should expect to hear these steps.
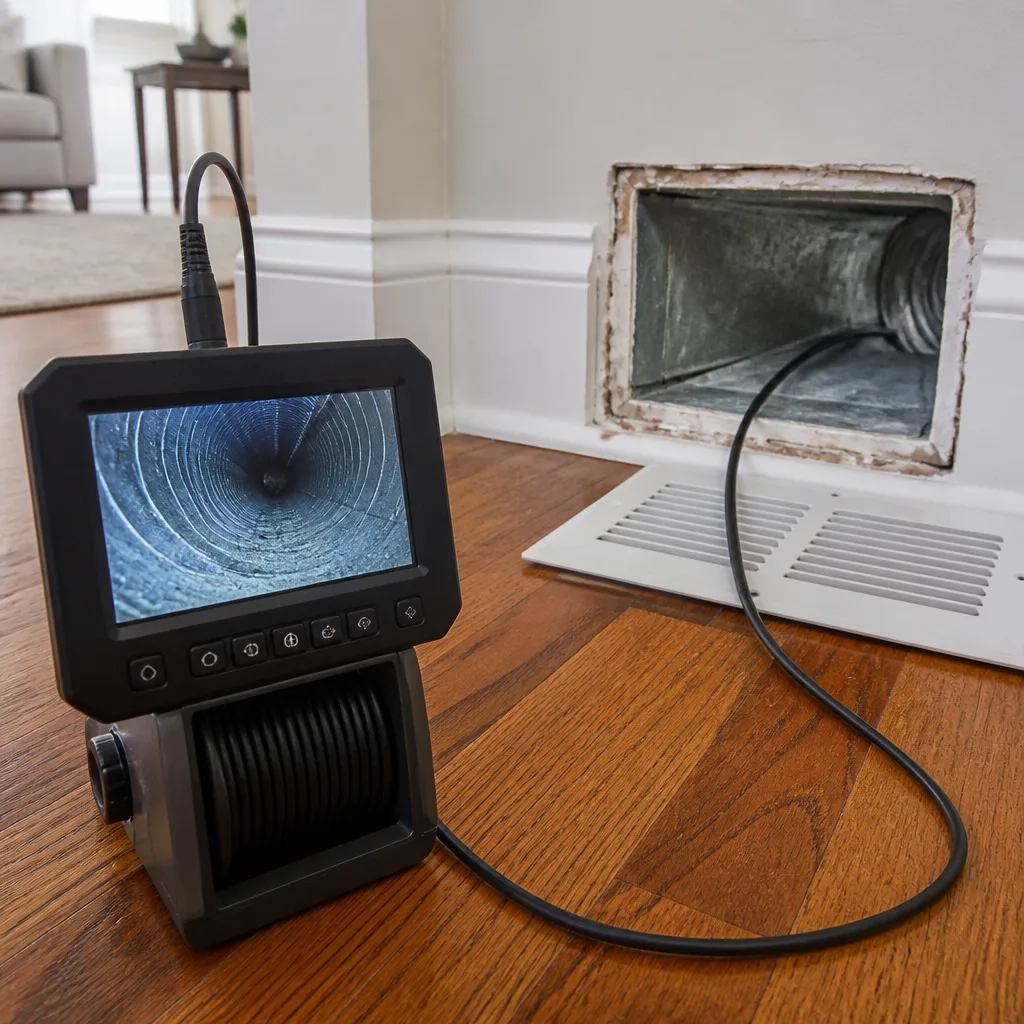
Step 1: Inspection. Before any cleaning starts, the technician should inspect the system. That means removing register covers, looking into the main trunk and branch lines, examining the air handler and coil, and checking for moisture, mold evidence, or damaged ductwork. This inspection determines the approach. If a technician skips the inspection and immediately starts setting up equipment, that’s a red flag.
Step 2: Setup and protection. Furniture near the work areas gets covered with drop cloths. Technicians wear shoe covers. Supply registers are sealed off so the system can be placed under negative pressure. In our Los Angeles work, where homes often have tight access and the air handler is frequently in a closet or attic, setup takes time and care. Homes with kids and pets, which are most of the homes in LA’s residential neighborhoods from Pasadena to Torrance, need that protection as a baseline, not an upgrade.
Step 3: Negative air pressure. The HEPA-filtered vacuum connects to the main trunk line, often at the plenum or a cut-in access point near the air handler. This creates continuous negative pressure throughout the entire duct system. This is the step that makes source removal possible. Without it, nothing that follows matters.
Step 4: Agitation and extraction. With the vacuum running, the technician works through each branch line from the register openings, using powered brushes or air whips to loosen debris from the duct walls. The loosened debris immediately moves toward the negative pressure source and into the HEPA filtration. Each supply register and the return plenum gets this treatment.
Step 5: Verification. After cleaning, the technician should show you what was removed and visually verify the duct interiors. Many companies now take before-and-after photos. You should expect to see the results, not just hear that everything went well.
At Morton’s Air Duct Cleaning, every job in Los Angeles includes this full source-removal process, a written price before any work begins, and a photo of the clean-up before the crew leaves. Those are the baseline expectations, not premium add-ons.
How to Evaluate Whether a Company Uses Proper Equipment
Not every company that calls itself a professional duct cleaner is running professional equipment. Some run a glorified shop vac and call it a day. Others use legitimate equipment but rush the job. The questions below will sort the real operators from the pretenders quickly.
Ask: “Do you use a HEPA-filtered negative air machine?” The correct answer is yes, without hesitation. If they tell you they use a “high-powered vacuum” without mentioning negative pressure or HEPA, ask specifically. A legitimate company will explain the process. A pretender will dodge.
Ask: “Do you clean every branch line individually, or just the main trunk?” The correct answer is every branch line, one by one, from each register opening. If they only clean the main trunk, they’re leaving the debris in the lines that actually deliver air to your rooms.
Ask: “Can you show me what you removed?” A company that takes pride in its work will offer before-and-after photos or at least show you the vacuum contents. If they can’t or won’t demonstrate the result, you have no way to verify the work happened.
Ask: “What’s your price, and does it cover the full system?” This is where Los Angeles homeowners get burned most often. The bait is a low per-vent price. The switch is adding on “deep cleaning” fees, antimicrobial treatment charges, or equipment fees once the technician arrives. We don’t do per-vent pricing. A whole-system cleaning in Los Angeles should come as one quote, in writing, before work starts, covering the full duct system: all supply lines, the main trunk, the return side, and the air handler cabinet. If the quoted number changes at the door, that’s not a company you want in your house.
Red flags in the answers: “We’ll give you an estimate when we see the job” paired with a too-low teaser number, any hesitation about whether the equipment is HEPA-filtered, and any pricing that depends on how many vents they “count” after arriving. Legitimate companies know their pricing model before they walk in the door.
What Los Angeles Homeowners Should Know Specifically
Duct cleaning needs vary by region, and Los Angeles has its own set of factors that make this conversation different from other markets. If you live in the LA basin, here’s what actually matters for your home.
First, our wildfire season has become a yearly reality. The smoke that settles over Los Angeles from fires in the Angeles National Forest, the Santa Monicas, or San Bernardino National Forest doesn’t just drift past your windows. It gets pulled into your return ducts, where fine particulate matter settles and accumulates. Homes in the Valley, from Sherman Oaks to Woodland Hills, see particularly heavy deposition because the topography traps smoke. After a bad fire season, the inside of a return duct can look like a fireplace flue. This particulate is exceptionally fine and requires real HEPA filtration to remove. A rental machine’s standard filter won’t touch it.
Second, LA’s aging housing stock means a lot of homes have ductwork that predates modern sealing standards. Ducts in pre-1980 houses often have gaps at the joints, which means whatever’s in your attic or crawlspace is also in your air stream. The dust you’re cleaning from your registers may be re-entering faster than you can remove it, which is why a professional inspection matters. You may need sealing or repairs as part of the service, not just cleaning.
Third, the marine layer along the coast from Santa Monica down through Long Beach brings morning humidity that condenses inside poorly insulated ductwork. That moisture creates a perfect environment for mold, which is a problem far more common in Los Angeles coastal homes than people expect. If you live west of the 405 and your home still has original ductwork, a professional inspection for moisture and mold is worth doing before you spend money on anything else.
At Morton’s, we’ve been cleaning ducts in Los Angeles since 2005, and we’ve worked in every part of this city, from Craftsman bungalows in Highland Park to mid-century ranches in the Valley. The duct problems in a 1965 home in Atwater Village are different from the problems in a 2000s tract home in Porter Ranch, and the solution needs to match the house, not the marketing script.
Common Mistakes to Avoid
- Running a leaf blower into your ducts. We’ve seen this more than once. The pressure is far too high, it creates a massive mess in every room with an open register, and it can blow apart weak duct joints. This is one of the quickest ways to need duct replacement.
- Using a shop vac without negative air pressure. A shop vac at the register pulls air from that one opening only. It doesn’t create the system-wide negative pressure that makes source removal possible, and it actively pulls loose debris toward the register rather than toward the main trunk. You’ll clean the first few inches and make the rest worse.
- Sticking a phone camera or flexible camera into the duct and calling it an inspection. A camera that can’t see around bends, doesn’t have a light source strong enough for trunk lines, and isn’t paired with a moisture meter tells you almost nothing useful. Duct inspections need proper equipment and someone who knows what they’re looking at.
- Buying the cheapest filter on the shelf every time. The $2 fiberglass filters do almost nothing for indoor air quality. A mid-grade pleated filter from Honeywell or Aprilaire captures dramatically more particulate without restricting airflow excessively. The right filter is a balance, not an extreme.
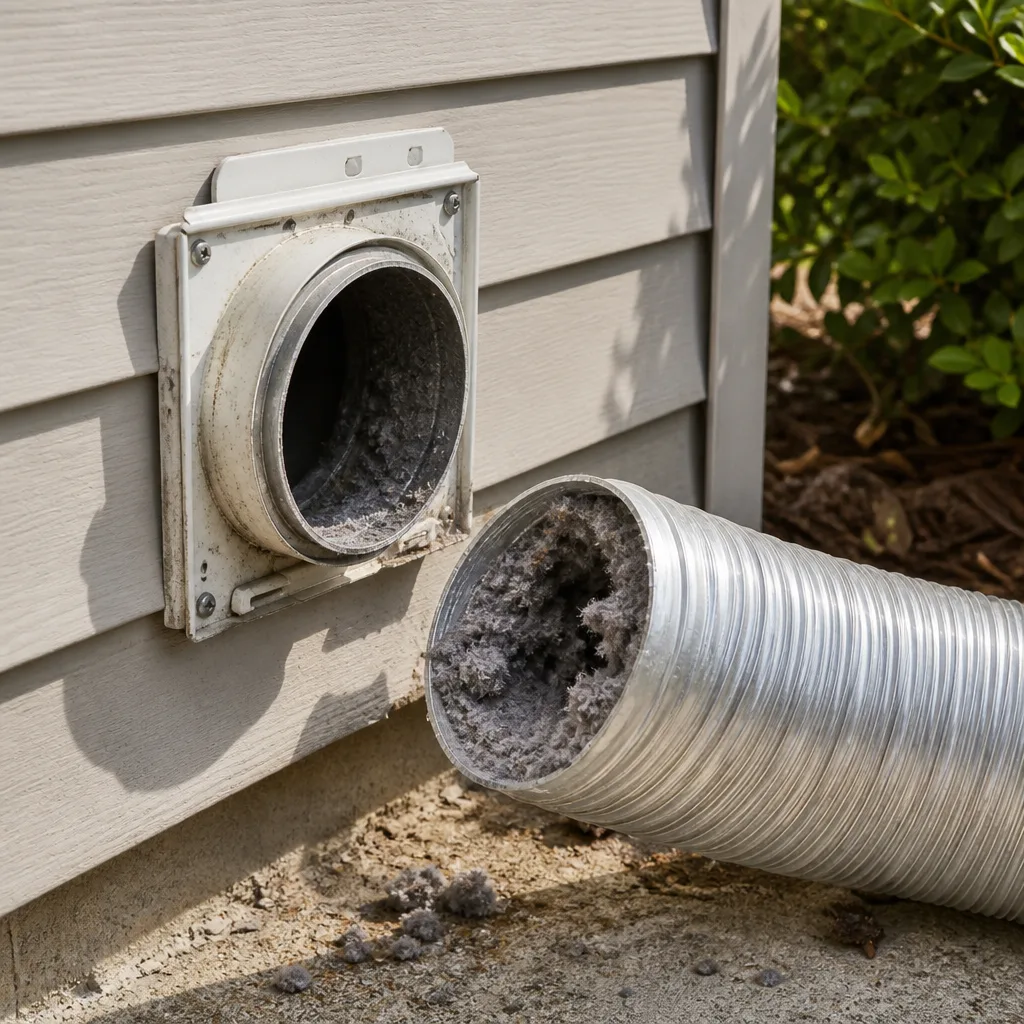
- Ignoring the dryer vent because it’s “not the air ducts.” The dryer vent is technically separate from your HVAC ducts, but it’s part of the same conversation about air movement. Clogged dryer vents are a serious fire risk, and they’re a service you should get professionally cleaned. We handle those in Los Angeles too, full dryer vent cleaning across the city.
- Trusting a DIY YouTube video that shows “results” without explaining the method. The problem with most DIY duct cleaning videos is that they show dust moving but not dust extraction. Without negative pressure, the “clean” duct in the after-shot has simply had its dust redistributed deeper into the run or blown into the room. The video doesn’t show where the dust went.
- Forgetting to clean the return side. DIYers focus on supply registers because those are visible, but the return side pulls air in and often has far more accumulated debris. Half the system is the return side, and skipping it means half the job never happened.
When to Call a Professional
Call a professional when you see visible dust or debris blowing from your registers when the system runs, when there’s unexplained dust accumulating on surfaces quickly after cleaning, when you notice a musty smell coming from the vents, when someone in the house has allergies that worsen when the AC cycles on, or when you’ve had a rodent, pest, or water issue in the ductwork. These are all signs that the system has accumulated enough debris that a surface-level DIY approach won’t help and may make things worse. Morton’s Air Duct Cleaning offers free estimates in Los Angeles, calls are answered by a live person, and every quote is in writing before work starts. Call (323) 918-4345 to schedule an appointment.
Frequently Asked Questions
No. DIY air duct cleaning without a HEPA-filtered negative air machine connected to the main trunk line moves debris around rather than extracting it, and the agitation can push contaminants deeper into branch lines or blow them back into your living space. The two things worth doing yourself are filter replacement and register cover cleaning, not duct interior work.
Professional whole-system air duct cleaning in Los Angeles typically ranges from $450 to $900 depending on home size, number of systems, and duct condition. This should be quoted as one flat price for the entire system, in writing, before work starts. If a company quotes per vent, ask for a whole-system price instead.
You can rent equipment, but the machines available to rent lack the suction power and HEPA filtration of professional systems like Rotobrush and Nikro units, and they don’t create the simultaneous negative air pressure required for source removal. The rental attempt usually redistributes dust rather than removing it, and it can damage flexible duct liner.
Most Los Angeles homes benefit from professional air duct cleaning every three to five years, though homes with multiple pets, significant wildfire smoke exposure, recent remodeling, or allergy-suffering family members may need it more frequently. For related advice, see our DIY vs Professional Dryer Vent Cleaning: What’s Safe to Do Yourself. Filter replacement every 60 to 90 days is far more important for day-to-day air quality than frequent duct cleaning.
Yes, source-removal cleaning with proper HEPA filtration removes accumulated dust, pet dander, pollen, and post-wildfire particulate matter from the duct system, which means less of that material recirculating through your living space every time the HVAC runs. The benefit is most noticeable in homes with pets, allergy sufferers, or recent construction dust.
Companies that quote dramatically lower prices are usually either not running proper HEPA-filtered negative air equipment, only cleaning the main trunk and skipping branch lines, or using a low teaser price that will climb once the technician arrives with add-on fees. A legitimate whole-system cleaning in Los Angeles requires professional equipment and labor that cannot be produced for bargain rates without cutting corners or hiding costs. For more guides & resources on protecting your home’s air quality, explore our blog.
The Bottom Line
The honest answer is that DIY air duct cleaning, in the sense of cleaning the interior of the ductwork yourself, doesn’t work. It redistributes rather than removes, risks damaging your ducts, and can void HVAC warranties. The two tasks worth doing yourself are filter replacement and register cover cleaning, done properly and consistently. Everything inside the ducts requires professional negative air pressure equipment and the knowledge to use it correctly. In Los Angeles, with our wildfire seasons, coastal humidity, and aging housing stock, professional cleaning every three to five years is a sensible maintenance expense that protects your air quality and your HVAC system. Get a written whole-system quote before work starts, from a company that can explain their process in plain English and show you the results.
Written by Paul Adeyemi, Owner at Morton’s Air Duct Cleaning, serving Los Angeles since 2005.